Below walks through the creation of a malware analysis VM using the latest version of Windows 11 (24H2) and Mandiant’s Flare-VM. This is a much easier process to do on Windows 10, but if you need to use Windows 11 there are a few pitfalls that need to be overcome. This guide walks through all issues and solutions when going through this process.
Specifications
Below are the specifications of the Virtual Machine. Note I was using VMware Workstation 16.
- 2 Processors
- 2 Core’s Per Processor
- 8GB RAM
- BIOS Type = UEFI
- Virtualisation Intel VT-x/EPT enabled
- Briged Network Connection
- 200GB Disk Space
Windows 11 Installation
Go through the standard installation process for Windows 11 Professional. Elect to create a local account and don’t set a password. This can be done after the completion of the installation of Flare-VM.
If you require steps to bypass TPM/Secure boot checks then follow the below steps:
- Press Shift + F10
- Regedit
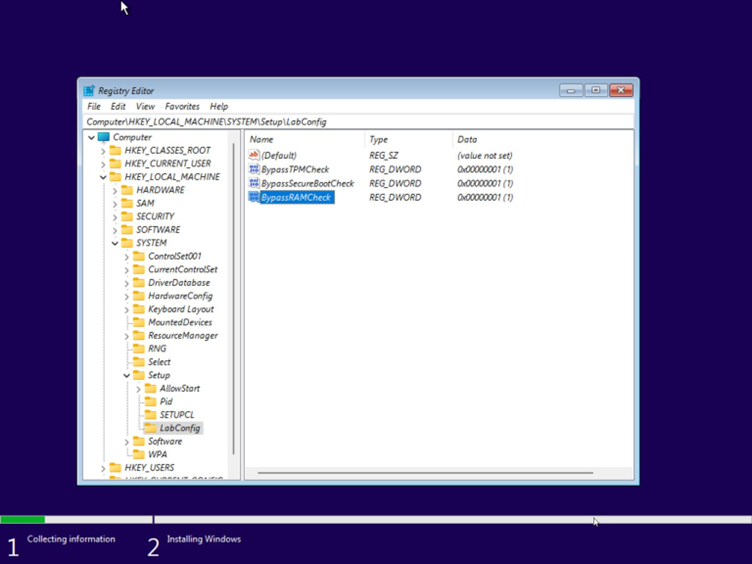
- HKEY_LOCAL_MACHINE\SYSTEM\Setup
- Create a New Key “LabConfig”
Now right-click on the LabConfig key and select New > DWORD (32-bit) value and create a value named BypassTPMCheck, and set its data to 1.
Now create the BypassRAMCheck and BypassSecureBootCheck values and set their data to 1 as well, so it looks like the following image.
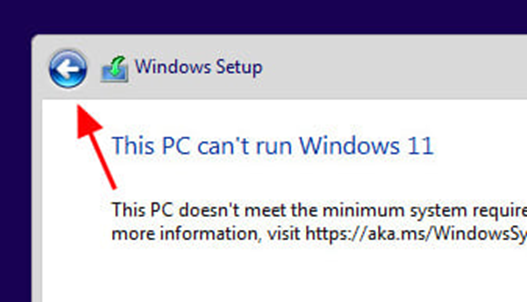
Once created close regedit and the command terminal. Press the back arrow and try again.
Once installed perform the following before moving onto the next steps:
- Check for and install the latest Windows Updates
- Change Power plan to High Performance and set Turn Off the display to “Never”
- Install VM Tools
It might be worth at this point performing a snapshot.
Disable Defender
As this will be an analysis VM we don’t want Defender enabled in any shape or form. Defender has a tenancy to switch certain engines back on at random or on reboot, and with tamper protection it can be difficult to completely disable it. One method is to “break” Defender using safe mode.
For this, you will need to boot into safe mode. Perform the following steps:
- Windows key + R
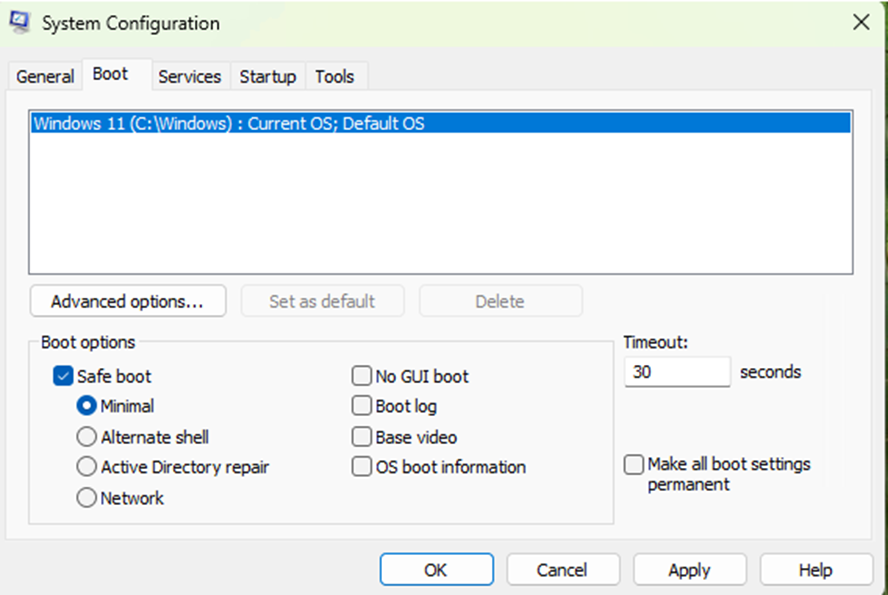
- Type msconfig <enter>
- Open the tab Boot
- Select Safe boot, Minimal and press OK and Apply
- Restart the virtual machine
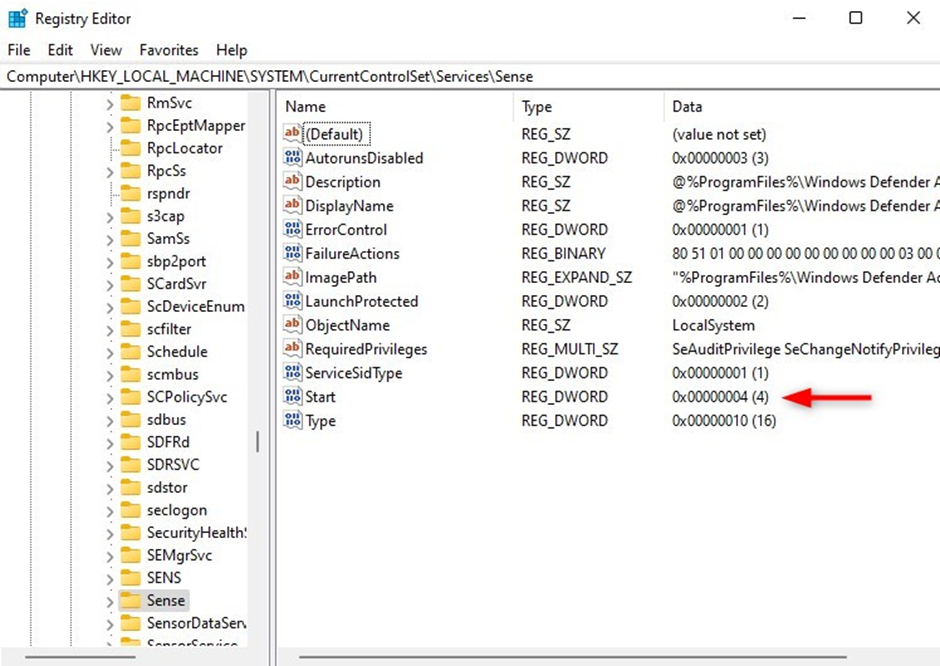
Once booted into safe mode perform the following steps to modify the registry:
- Press Windows key + R
- Type regedit <enter> to open the registry
- Navigate to HKEY_LOCAL_MACHINE\SYSTEM\CurrentControlSet\Service
Within the following folders modify the key Start to 4
- Sense
- WdBoot
- WdFilter
- WdNisDrv
- WdNisSvc
- WinDefend
Once changed perform the following steps to restart the system out of safe mode
- Windows key + R
- Type msconfig <enter>
- Open the tab Boot
- Deselect Safe boot, Minimal and press OK and Apply
- Restart the virtual machine
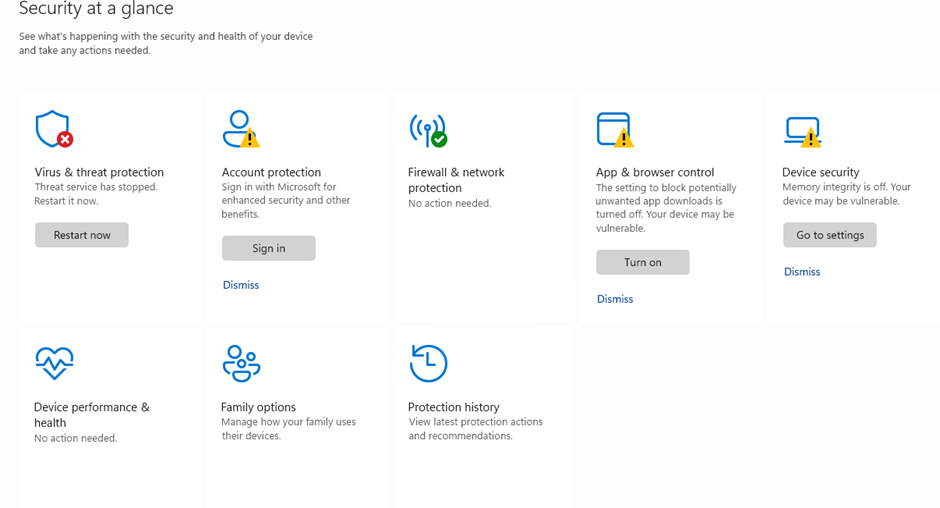
Once restarted Defender should now be in an unknown state and unable to restart.
Disable Windows Update
Again, we need to make sure that a Windows update does not switch back on Defender or change any of the settings of the virtual machine. Thankfully, it is much easier to switch off Windows update. Follow the below steps:
- Open Start.
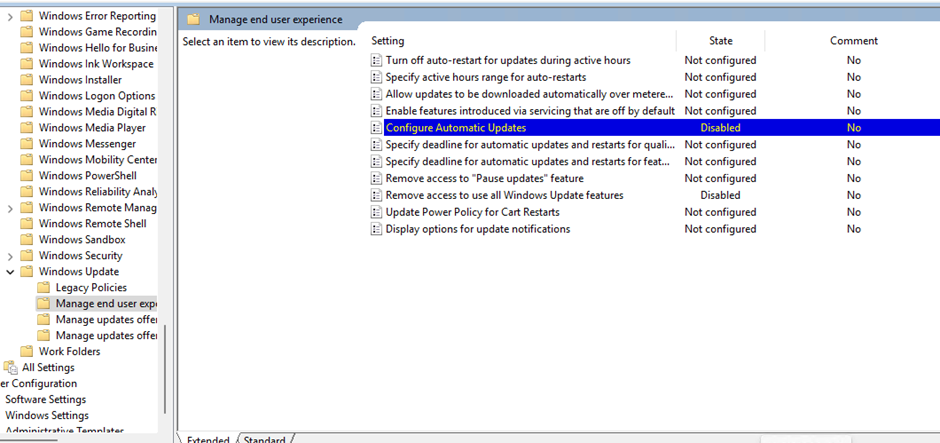
- Search for gpedit.msc and click the top result to launch the Local Group Policy Editor.
- Navigate to the following path: Computer Configuration > Administrative Templates > Windows Components > Windows Update > Manage end user experience
- Double-click the “Configure Automatic Updates” policy on the right side.
- Check Disabled
- Restart the machine
Flare VM Install
https://github.com/mandiant/flare-vm
Once the above steps have been performed the Flare VM scripts can now be installed on the virtual machine. Run the following commands:
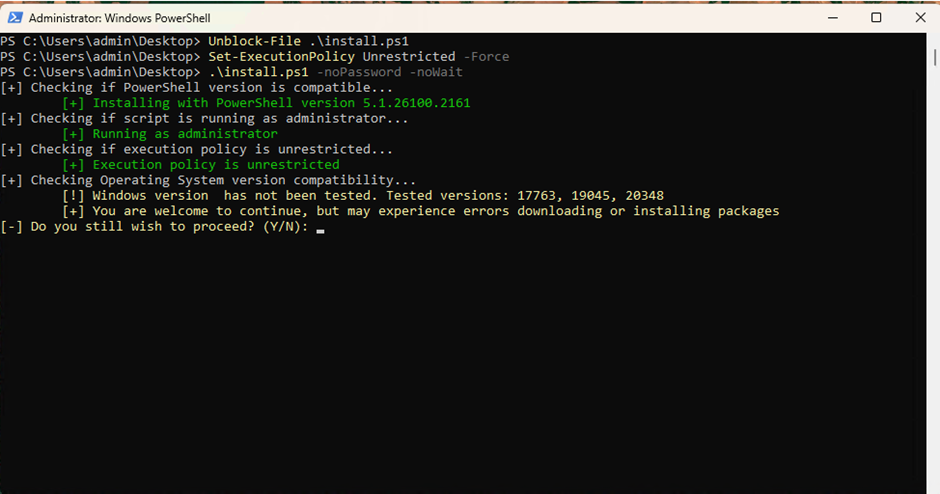
Open PowerShell as an Administrator and navigate to the admin Desktop:
cd C:\Users\admin\Desktop\
(New-Object net.webclient).DownloadFile('https://raw.githubusercontent.com/mandiant/flare-vm/main/install.ps1',"$([Environment]::GetFolderPath("Desktop"))\install.ps1")
Unblock-File .\install.ps1
Set-ExecutionPolicy Unrestricted -Force
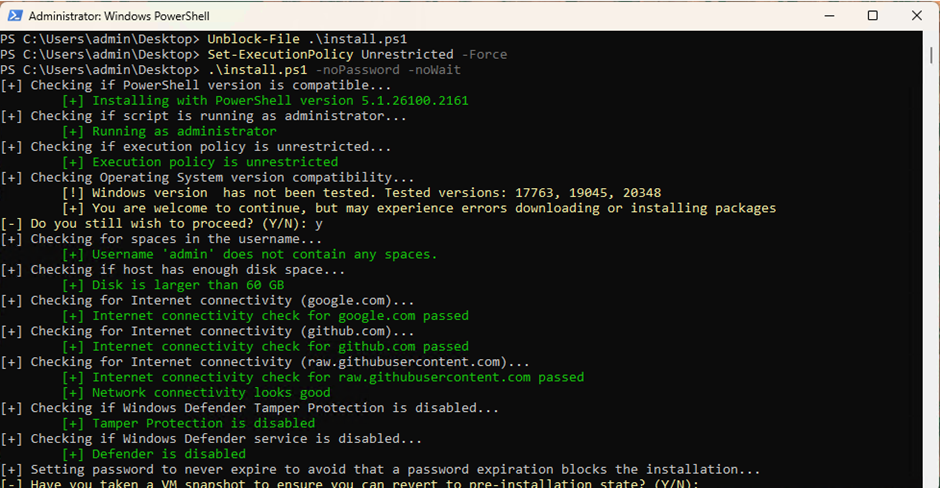
.\install.ps1 -noPassword -noWaitYou’ll get an warning about operating system incompatibility, type Y and press Enter to continue.
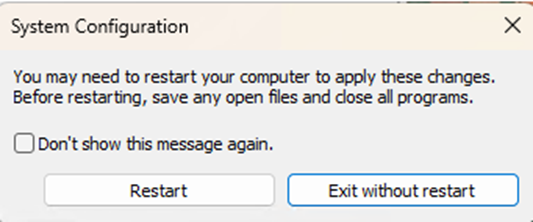
Should all the steps have been followed to disable Windows Update & Defender then you should see the below. When asked about taking a snapshot enter Y and press enter.
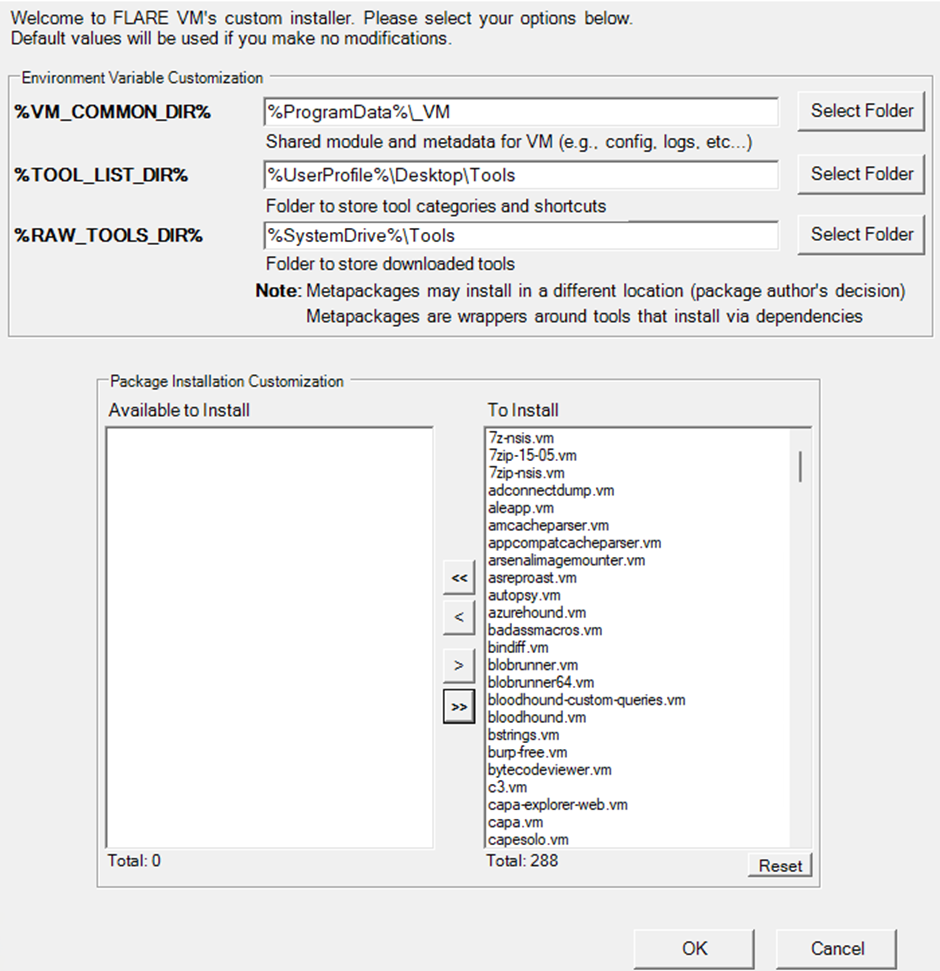
The Flare VM GUI Custom Installer should appear. Select all available packages > to install and press OK.
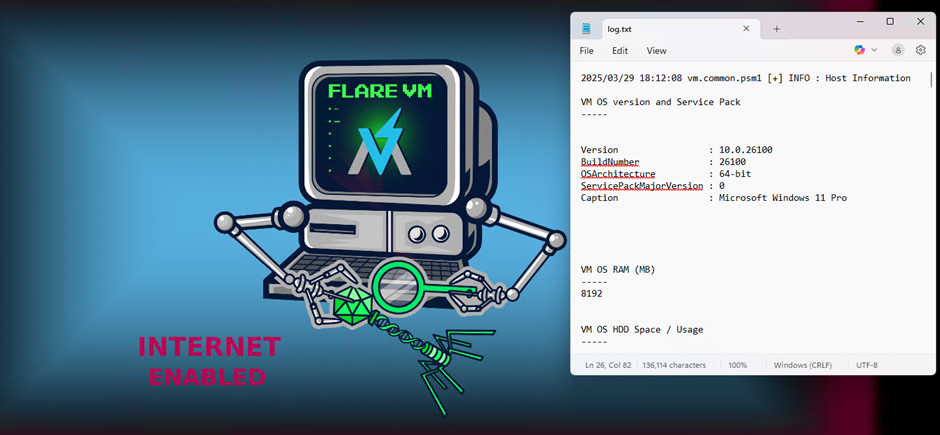
It will take several hours to complete. But once complete the log.txt should appear confirming the installation status off the listed applications.
Once the installation has finished DO NOT RESTART THE machine. You need to make the following change to the registry as per the reported bug, otherwise you won’t have an internet connection:
https://github.com/mandiant/flare-vm/issues/659
Open up regedit and navigate to HKLM:\SYSTEM\CurrentControlSet\services\Dnscache
Change the Key Start to 2.
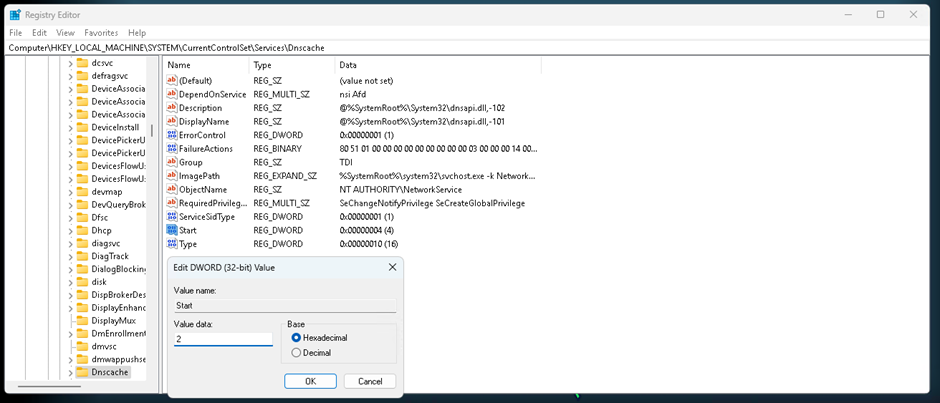
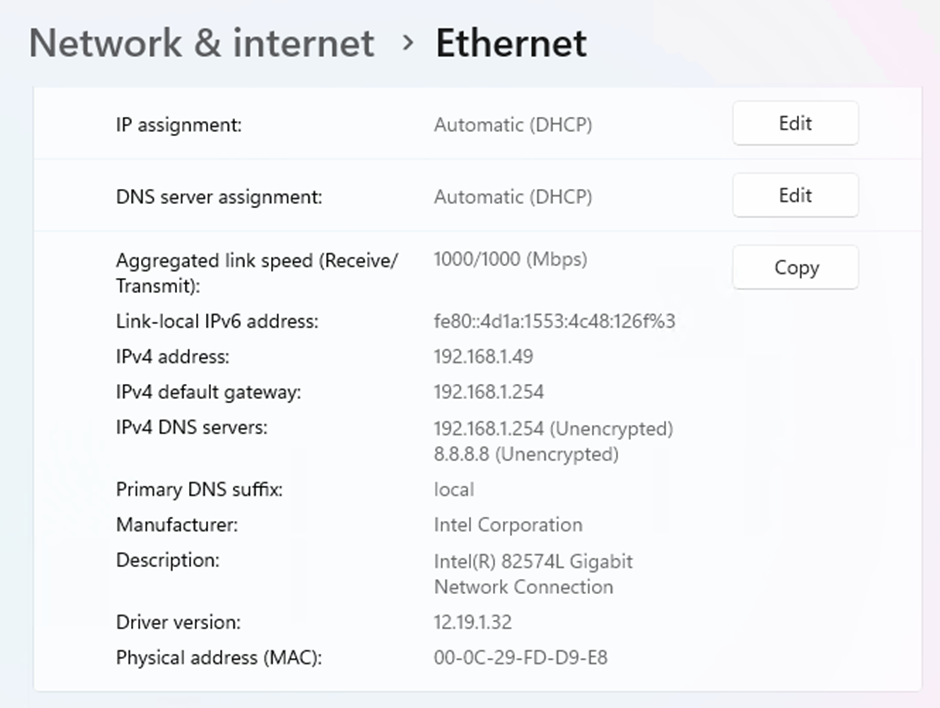
Once set double check your DNS Settings are set correctly before then restarting your machine.
Optional Steps
There are a number of quality life fixes have I chosen to do after completing the install. These are optional but they are documented below:
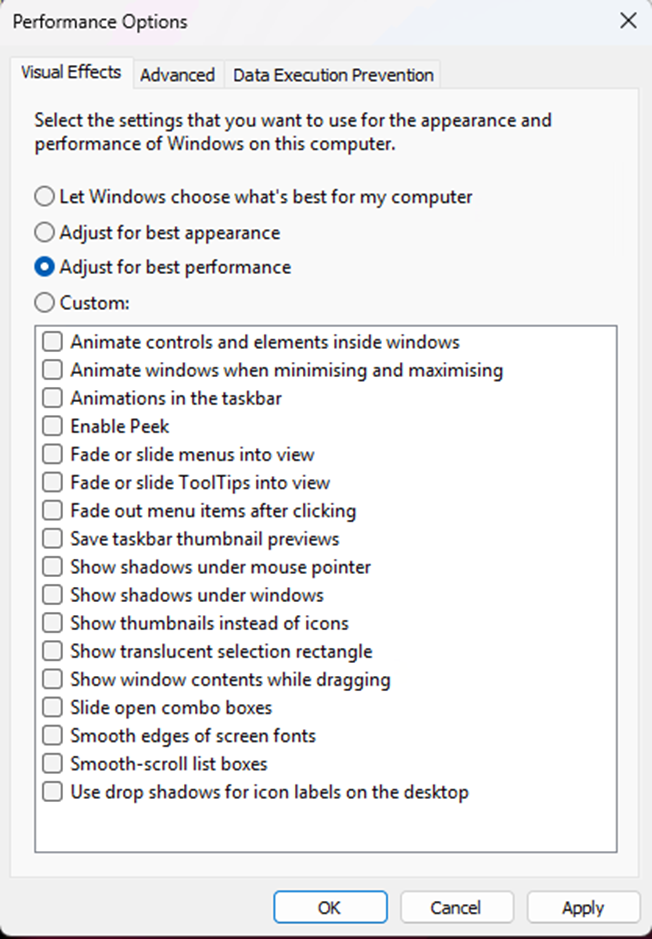
- Change Visual Effects for best Performance
- Uninstall any Microsoft Bloatware Apps
- Microsoft Copilot, Xbox etc
- Uninstall OneDrive
- Install any other applications you need. Ninite is a good resource for that
- Return the old right click
- Set up Burp suite with Firefox
- Remove any CD/DVD Drive from the Virtual Machine
- O-O Shutup Windows
- Install Microsoft Windows Office
- Install Screen2Gif
- Clear Web Browser History
- Enable Linux Subsystem
- wsl –install
- wsl –install -d Ubuntu-22.04
- wsl –install -d kali-linux
Once you have done all that, take a clean snapshot and enjoy your new VM 😊